Showing posts with label lime. Show all posts

Monday, April 29, 2024

Mexican Street Corn: my latest addiction/obsession

 We all go through faves phases, right?  My latest food I think about all the time is Mexican Street Corn.  I like it on the cob, grilled and slathered with that delicious seasoned crema. But, I also like it off the cob, in the form of a salad. Certain restaurants around town offer their versions and many are quite good, but as is usually the case, I like it best when I make it myself.


A recent, super-quick dinner we made was lime shrimp and Street corn salad. I realize my photo is all yellow up in your face, but I've never claimed to be a master photographer. 

 Vivian was responsible for the salad and used a Weight Watchers recipe as a base.  If you've ever made this before, you know that you can vary it in all kinds of ways.  In this version, she used:

  • 2 1/2 c. frozen corn (thawed, duh!)
  • 2 Tbs light mayo (or Mexican crema, or a combo of them both)
  • zest of 1 lime
  • juice of that lime
  • 3/4 tsp chili powder
  • 1/4 tsp smoked paprika
  • 1/4 tsp Kosher salt
  • 1/4 c. sliced scallions (green onion)
  • 2 Tbs chopped cilantro
  • 1 med jalapeno, chopped
  • 1/4 Cotija cheese, grated   
You mix it all up and that's all she wrote.  Obviously, you can use fresh corn.  Sometimes we grill it and give it a light char, sometimes we just use it raw.  Same thing with frozen. You can thaw it and then "grill" in a pan to give it that little bit of char too. Or, use it raw.  Corn is so naturally sweet that it really doesn't even need to be cooked. It's all up to you.

A word about Cotija. It's ridiculous how difficult it can be to find this stuff in a grocery store. If you do, most often, it's a solid block and being a hard, crumbly cheese, grating it can be messy.  Here's the shocker: I will actually force myself to enter a Wal-Mart because of this. 


It's a one pound bag of grated Cotija cheese.  Wal-Mart, God-forsaken Wal-Mart, is the only place I've ever seen this. Having it already grated makes it super convenient to work with, obviously. It's slightly salty, kind of like a version of Parmesan.  It's good sprinkled on just about anything.

Now, about the shrimp.  Shrimp is one my favorites things to have in my freezer for two reasons:  A) I love it. B) It is ridiculously easy to prepare and cook.  I can't remember where I came across this recipe, but I've been making it for years.  You can't ask for something quicker and easier and it's just simply delicious.

  • 1 lb. shrimp, peeled, deveined, patted dry
  • 4 Tbs butter, divided
  • 1/4 chopped shallots (NOT green onions, shallots)
  • 1/4 c. lime juice
  • 1 tsp lime zest
  • 1/4 tsp crushed red pepper
  • 1/3 c. chopped cilantro
Season your shrimp with salt & pepper. Heat a large skillet to med-high; add 1/2 Tbs butter and shrimp. Cook about 1 1/2 to 2 minutes per side and transfer to a plate. 

Over med-low heat, melt another Tbs butter and add shallots, lime juice and crushed red pepper. Cook for about 2 minutes. Add remaining butter, zest, shrimp and cilantro and toss all together.  

This shrimp is fantastic because it's just different.  And, since some people find themselves intimidated by cooking seafood, this recipe demonstrates that it is quick and easy, just pay attention to your temps and timing.  If you don't already do this, have all your stuff measured out and waiting by the stove so you don't get distracted with ingredients and lose track of what you're doing. 😉  Buen provecho!

Monday, March 18, 2013

Simple, Sublime *Key Lime*

I met Neil in 1997.  He was born in Florida, but when I met him, he'd recently landed in SC after 15 or so years in the Norse Land (you may know it as Minnesota).  Over those years, he'd been back and forth to FL, since his parents had moved back down thereAs we got to know each other, I learned a lot of interesting things: practically everything in America was invented in MN ('cause they spend half the year locked up in their snowed in houses just thinking up stuff?), when racing jet skis on TV, wear bathing trunks with a drawstring waist (MOOON over Miami), Ducatis are the only motorcycles worth owning and most importantly, real key lime pie is NOT green.

Garnished with one of our teeny, tiny limes

Up until this point, key lime pie never really piqued my interest. At. All. But, turns out, it's Neil's most favorite dessert on Earth.  But, as he was making me aware of this, he also educated me of something I'd never heard before.  Real key lime pie isn't green.  Lime pie is green, perhaps.  Food coloring helps too. But a real key lime isn't the same as the big limes we all see on a regular basis.  No, key limes are tiny.  

See the size of these little babies?
Seriously, like the size of a ping pong ball and that's considered a big one.  And, key limes are way more tart than "regular" (Persian) limes.  In fact, these little green orbs will turn your cheeks inside out...that's how tart we're talking about!  So, Neil advised me of this:  if you see a "key lime pie" in a restaurant that is green, know this:  it's not real key lime pie. Just say NO.

Soaking up some sun
 Well, here we are all these years later and we're married and have a wonderful little girl. And, I've been making key lime pies for awhile now.  The first time, I bought a bag of key limes from the grocery.  Like I said, they are tiny.  So, I cut them all in half, clutched them in my fingers and juiced them one by one. When it was over, I could hardly unclench my fists and was convinced that I'd just given myself incurable arthritis. I vowed that as much as I loved Neil, this was his one and only homemade key lime pie.  
The life saver
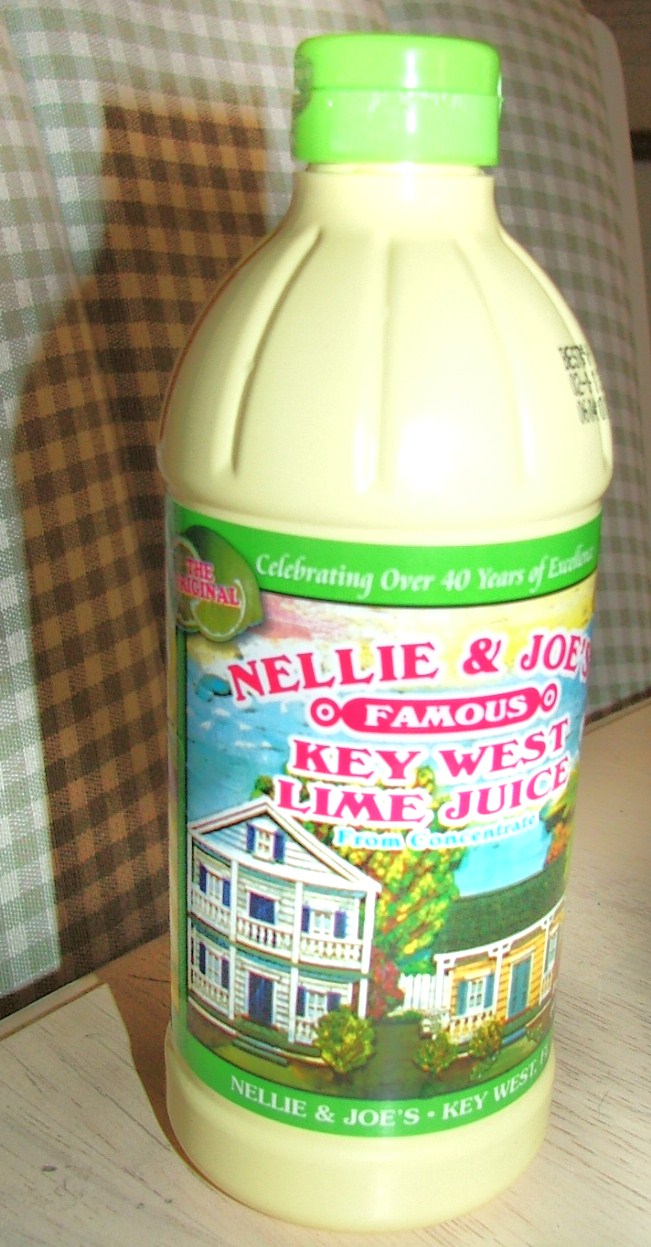
Well, lucky for him, I was browsing around Williams-Sonoma one day and lo and behold!  I discovered you can BUY key lime juice in a bottle!  Now, this was a game changer, indeed.  I bought a couple bottles of (really) expensive juice and ran right home to bake up a pie. Months later, my sister was visiting and saw this primo juice in my fridge and said something like, "You know you can get this in the grocery store, right?"  Bahh wuhhh?  So, my little sister drove over to the Piggly Wiggly and returned with four bottles of key lime juice for the price of my two Williams-Sonoma bottles.  But, no worry...now we're in business!  I can make Neil's fave anytime I want.  Easily, inexpensively and all year long.  Good thing for him, because I was never juicing those little limes by hand ever again. Never, ever, ever, again. Period.


Fast forward to today.  I now have the most awesome juicing tool ever invented.  Good thing too, since this Christmas, my parents found a key lime bush that has been cross-bred with a loquat, so it can withstand colder temps than they have in Florida.  So, now we're growing our own key limes on the patio! I wouldn't be so excited about this if it were not for my juicer, especially since I'd vowed never to juice those things by hand again!  Of course, you just can't beat the bottled juice, but if you want to go old school and juice yourself, you must get one of these.  Plain and simple.

You just need this for any kind of citrus juicing...go get one!

 This weekend was St. Patrick's Day.  We were having corned beef and cabbage at my inlaws' house on Sunday.  The only thing I had on hand that I could whip up quickly that was remotely "green" was key lime.  I was able to harvest one of our tiny baby limes to garnish and the pie turned out terrific as usual.  The crazy thing is how easy this recipe is.  Most of the time, you use a graham cracker crust, which is quite delicious.  But one day at the grocery, I came across a granola crust, which I'd never seen before.  I used one for this latest pie and it was terrific.  In fact, it was better than a plain ol' graham cracker crust.  I think this will be my new "go to" for these pies.  

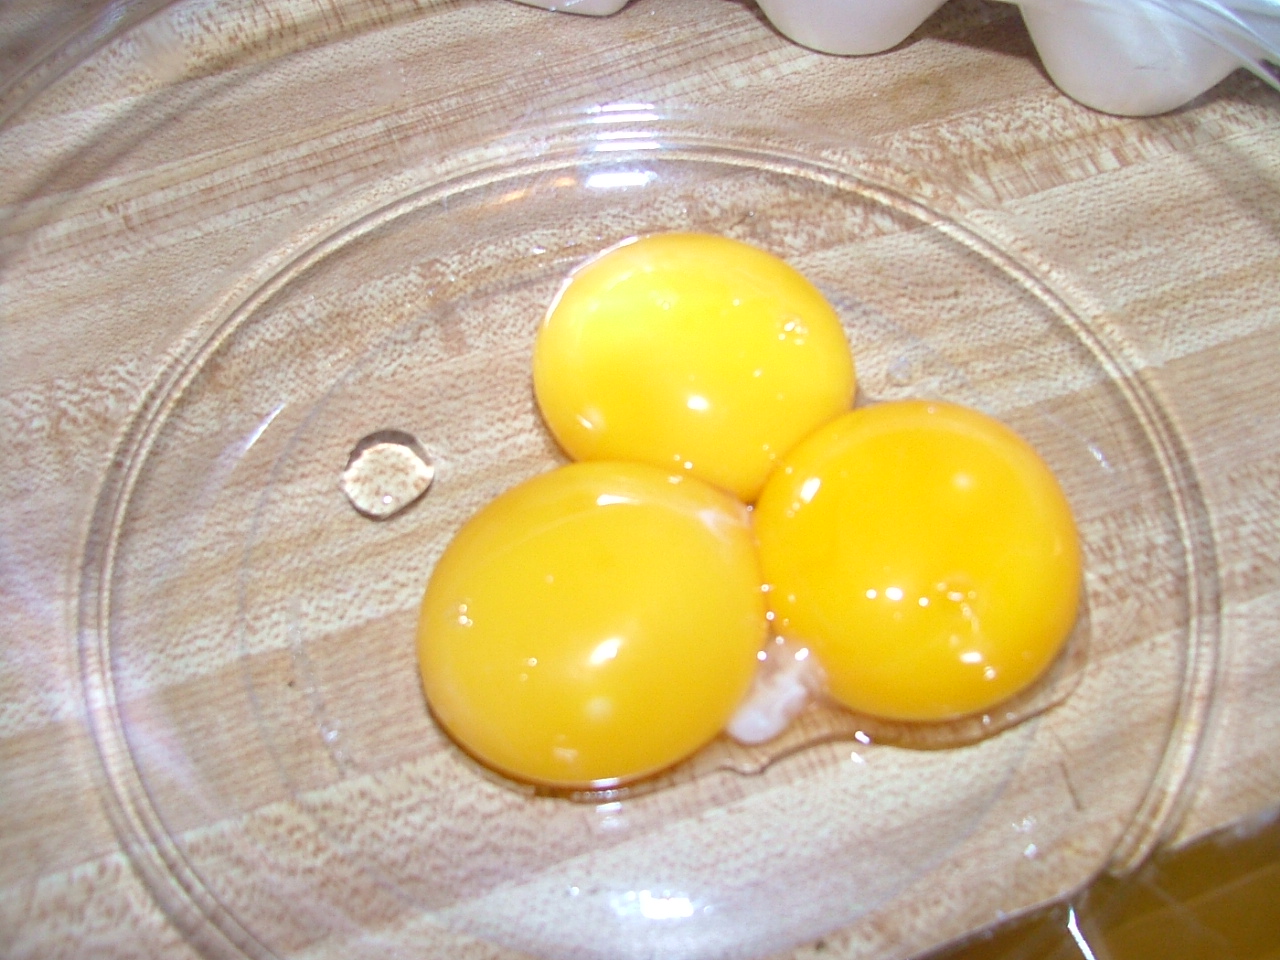
The low-down on key lime pie is this:  don't waste your time with "regular" lime juice, either juice your own little tiny key limes or buy the key lime juice...there IS a difference!  A half cup juice, 3 egg yolks and a can of condensed milk.  Mix until smooth, pour into pie shell and bake at 350 for about 15 minutes.  

Another must-have:  egg separator


Good eggs are important


Look at that beautiful yellow!


Freeze egg whites in individual packages for future recipes
Then, cool for about 10 minutes before refrigerating.  Garnish as you wish, but rest assured, it wil be happily consumed decorated or plain Jane!


Garnish or dive right in...your call!
 

LinkWithin

Related Posts Plugin for WordPress, Blogger...